The Manage Task Groups function in the Environmental Screening Tool (EST) Tools menu enables Environmental Management Office (EMO) Managers, Florida Department of Transportation (FDOT) ETDM Coordinators Primary, and FDOT ETDM Coordinators to manage tasks and groups by:
· Creating groups and assigning new and existing tasks
· Assigning or removing tasks from an existing group
· Removing groups
· Deleting tasks
Using the Manage Task Groups Tool:
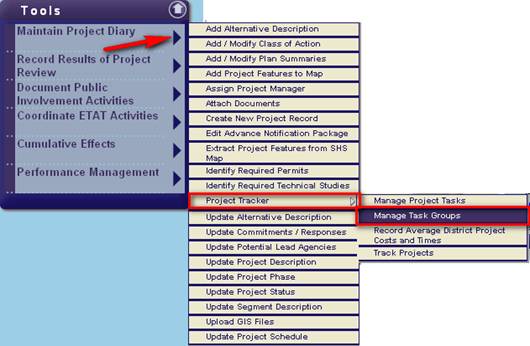
1. On the Tools menu, point to Maintain Project Diary, select Project Tracker, and then click Manage Task Groups.
The Manage Task Groups window opens as a tabbed page, displaying a search filter and a page toolbar.
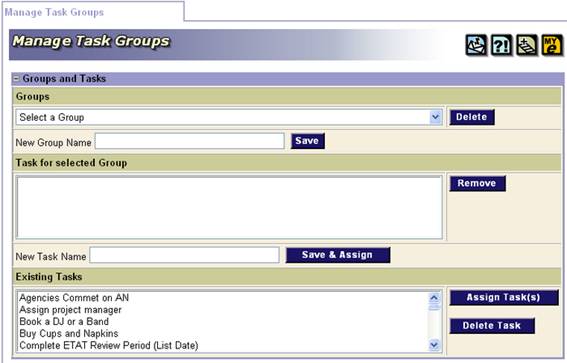
Tip! Click on the toolbar icons to:
 Send feedback about the current page.
 Access online Help.
 Bookmark the page.
 Add the page to your My ETDM preferences.
For additional information about using the EST page toolbar buttons, refer to Chapter 2.8 of the EST Handbook.
2. To create a group and assign tasks to it, do the following:
· Under Groups and Tasks, type the name of the new group in the New Group Name field, and then click Save. For the next illustration, the new group name is Bob's Group.
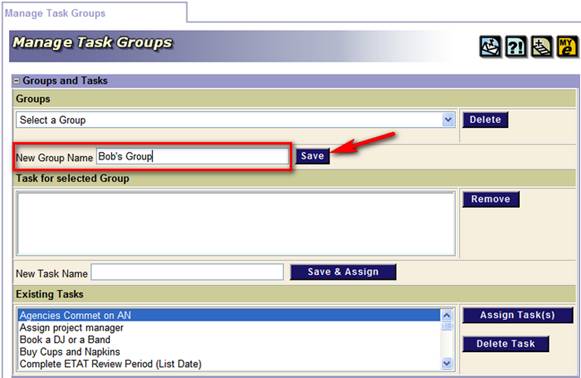
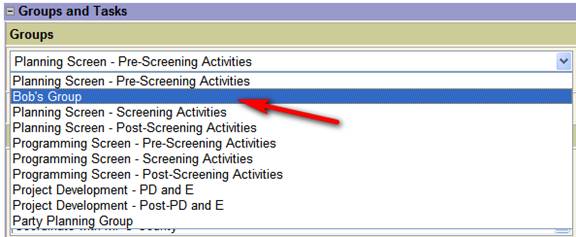
The new group name—Bob's Group—now appears in the group list of the Groups field.
Once you have created a new group name, you can assign tasks to the group by:
o Assigning existing tasks
o Creating and assigning new tasks
· To assign tasks that already exist in the database, do the following:
o Under Existing Tasks, select the task(s) from the list of options.
Tip! You can select multiple entries by pressing SHIFT+click for adjacent entries or CTRL+click for non-adjacent entries.
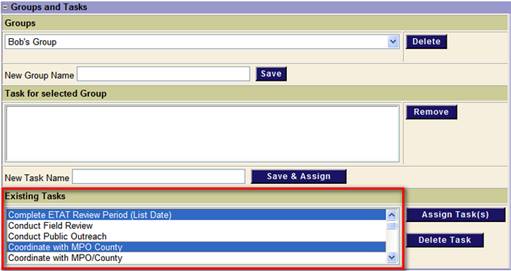
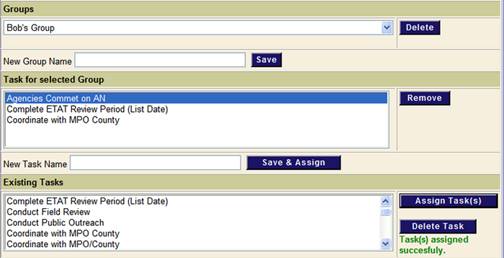
o Click Assign Task(s).
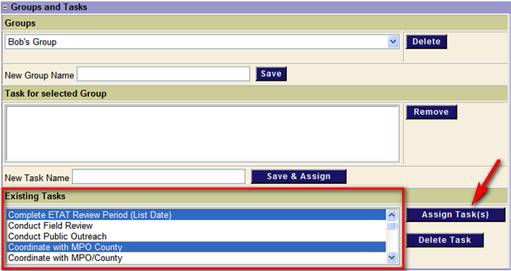
The selected tasks now appear in the Task for Selected Group field, and the EST displays a message that the Task(s) were successfully assigned.
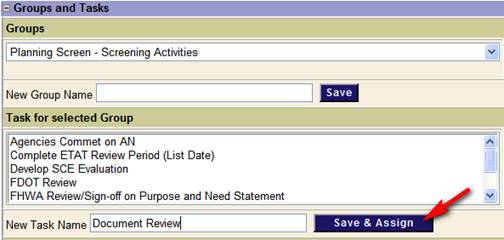
· To create a new task and assign it to a group, do the following:
o Under Task for selected Group, type the task name in the New Task Name field. For the next illustration, the new task name Develop Documentation was created.
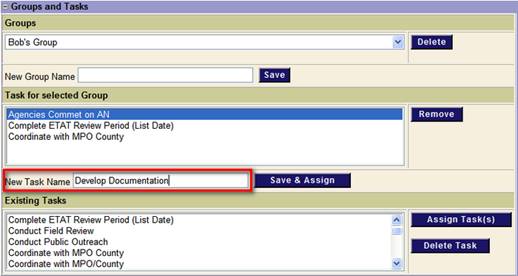
o Click Save & Assign.
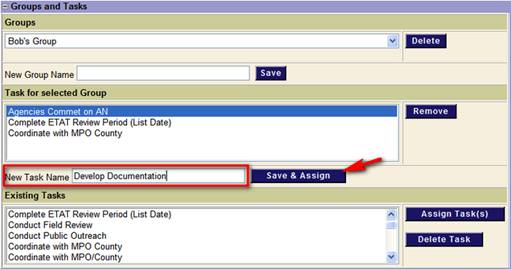
The new task—Develop Documentation—now appears in the Task for selected Group field and in the Existing Tasks field, which means it can be assigned to other groups.

3. To manage the tasks for an existing group, do the following:
· Click the drop-down arrow  in the Groups field, and then select a group from the list.

The group name now appears in the Groups field along with the list of tasks assigned to the group.
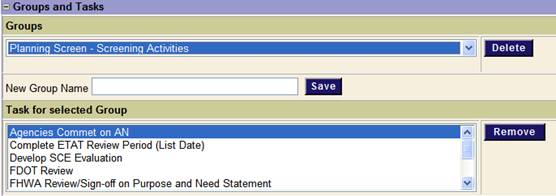
You can remove tasks from this group or create a new task and assign it to the group.
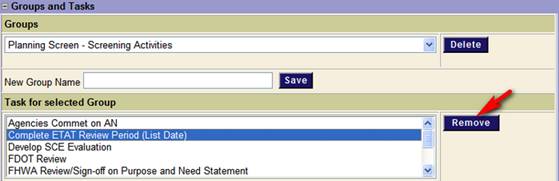
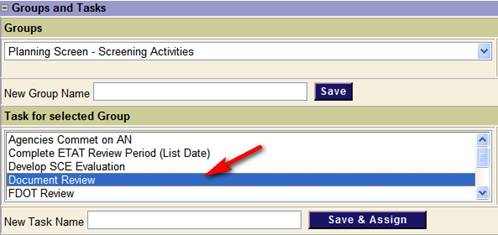
· To remove an assigned task from a group, select the task from the Task for selected Group field, and then click Remove.
Note: A task can only be removed from a group if there are no other projects assigned to that task.
A message appears asking you to confirm the deletion. Click OK.

The task is removed from the list of tasks for the selected group.
Note: Tasks removed from the list in the Task for a selected group field are not deleted from the list of Existing Tasks.
· To create a new task for an existing group, do the following:
o Type the task name in the New Task Name field.
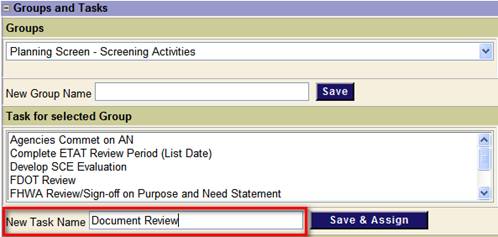
o Click Save & Assign.
The new task name appears in the Task for selected Group field.
4. To delete a group from the list in the Groups field, do the following:
· Click the drop-down arrow in the Groups field, and then select a group from the list. For the next illustration, the group Bob's Group was selected.
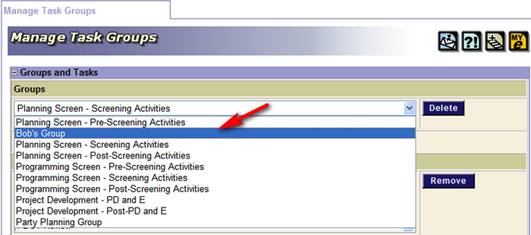
Note: A group cannot be deleted if there are other projects that have assigned tasks for that group.
· Click Delete.
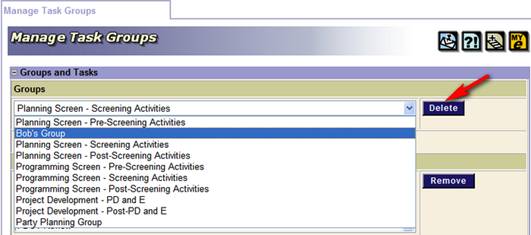
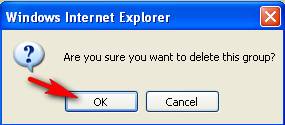
A message appears asking you to confirm the deletion. Click OK.
The group is removed from the list of in the Groups field.
5. To delete tasks from the Existing Tasks list, do the following:
· Click the drop-down arrow  in the Existing Tasks field, and then select a task from the list. For the next illustration, the task Document Review was selected.

· Click Delete Task.
Note: A task cannot be deleted if it is still assigned to another group or project.
